Guitar Repairs & Restorations
Here are just some examples of the repairs
I have worked on recently ..
The page is split into 3 categories.
1 - Electric Guitar Repairs;
2 - Acoustic Guitar Repairs;
3 - Other Instruments
 Before:
This Hofner had been taken by the customer to a shop
for cosmetic refinishing, who had passed it to a third party for the work to be carried out.
They sanded it down so much they had worn through the Spruce veneer behind the bridge and tailstock area. At this point the customer re-claimed the guitar and brought it to me.
The veneer was no longer repairable, so a complete new piece of wood had to be let-in to the sound-board and carved to retain the tone and shape.
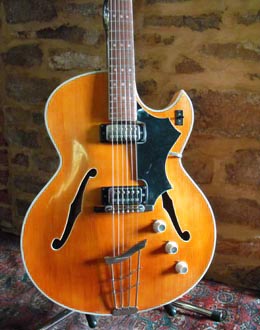 After:
Some work was also needed making a new scratchplate, as the old one was missing,
and that just left general fretwork and setting up to do.
All in all, it turned out really rather well, taking in to account where it was all heading before it came to me.
And the customer was delighted; which in the end is what counts!
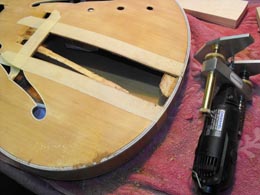
With the surrounding area masked off the offending area was
cut out. It was decided to use the centre line of the bookmatch, the purfling line and the line covered by the
bridge base, plus the required width, as the area to be
replaced. Note the strut under the top !
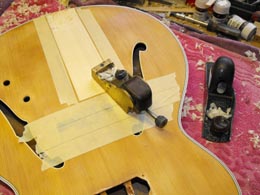
Using the best match I could find for
the piece to be let in, which was shaped to fit flush with
the internal shape first and then the outer curve of the top.
Finally, it was planed and scraped to flow with the curve
of the top.
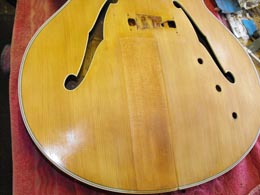
This photo shows the top after staining and several coats of toner
lacquer to even the tone out as much as possible.
Then into the spray booth, 2 - 3 weeks to dry, cut back and polish. That's all!!

Well, here it is, the finished article !
The customer (an engineer) took on the job of cleaning up all the metalwork and
knobs. A new, longer, bridge base was required to cover the width of the
join in the new piece underneath it. Also, there was a piece of spacer/plastic
insulator missing on the underside of the 3 way switch. VERY fiddly,
but successful!
Some work was needed fitting the new scratchplate, as the old one was missing,
and that just left general fretwork and setting up to do.
All in all, it turned out really rather well, taking in to account where it was all heading before it came to me.
And the customer was delighted; which in the end, is what counts!
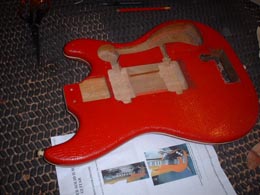 Before:
Apart from the deeper pick-up routs, this is how this Hofner
came to me.
The only hardware left on the body was the
mighty "agricultural" trem unit.
Note pics to use as a pattern!
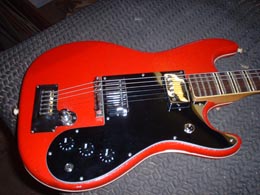 After:
Returned to its former glory!
The owner had been given this Hofner by the mother of a friend that had passed away. We both hope that he, wherever he may be, thinks we did it justice.
The owner also owns a 1996 Strat Ultra, that he now hardly ever uses !! Now I wonder why that is!!
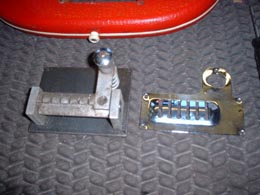
Here you can see what I'm talking about regarding the trem
unit ! This is after its been thoroughly cleaned and
overhauled. You'll have to imagine what it looked like
before; but you'll need a vivid imagination !

The neck had a full fret dress and polish, and was in pretty
good shape as far as straightness goes. The tuners
were stripped back to their component parts, cleaned,
lightly oiled and reassembled. They worked really well,
for their age !!
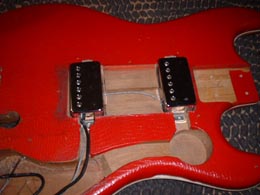
Making sure the pick-ups are at the right height, as the
neck sits a long way above the thin lines of the body.
Pick-ups are from Razor, as they were right for the look
and the heights needed.
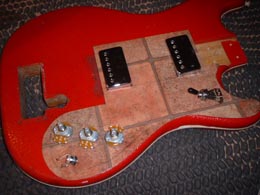
An old piece of vinyl made a good template for mounting
everything up in the right place, before committing to
cutting into the scratchplate. Note that the 3-way
switch, would have originally been a slide type that went
round in an arc. Hence the large rout for it shown on the
left!
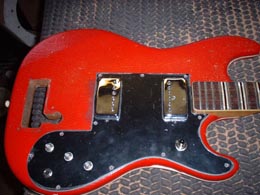
Final fitting of the plate, prior to assembling the whole guitar

Returned to its former glory ! The owner had been
given this Hofner, by the mother of a friend of his that
had passed away; So we both hope that he, wherever he may
be, thinks we did it justice.
The owner also owns a 1996 Strat Ultra, that he now hardly
ever uses !! Now I wonder why that is!!
Before:
This is what can happen when the
demon drink takes a REALLY good hold !!!! Note that the
binding has already been removed by the time I took this pic.
A new top was obviously required!
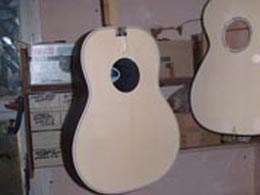 After:
Here's the finished repair ready to go into
the spray booth.
After that it was just a case of putting the whole thing
back together.
From the outside it looked just as it
did before, but inside and for the sound it made, it was a
different guitar. For the better that is!!
Much, much better!!!
Using a tool made for the job, the top was removed.
A pretty tough layer of Epoxy glue was left on the edge of the back. Scraping proved to be the only way of removal
This is what happens when someone over
tightens the bolts that hold the neck on. The alloy
threaded bar tries to pull out of the end of the tenon,
splitting the wood! The fix is to cut off the tenon, mortice into
the end of the neck and glue a new (and longer!) tenon in.
The new tenon glued in, and ready to
have the threaded alloy bar fitted. You can see the line on
the bottom of the tenon where it has to be drilled
Checking the fit of the bolts in the
rejuvenated tenon.
The mortice had to be routed out deeper to take the extra
tenon length, and with the back being made of composite,
it was a case of MASK OR DIE!!
It was decided early on to ditch the Ovation top bracing
design, in favour of a more trad' X
brace. Note the block under the front of the top to take the
neck extension pocket.
Well ! That all seems to work!
You can just about see the routed "staircase" ready for the
binding and purfling to be fitted.
Binding and purfling on; scraped back and sanded.
Here you can see the pocket, that takes the neck extension, that is under the end of the fretboard.
The finished repair ready to go into the spray booth.
After that it was just a case of putting the whole thing
back together. From the outside it looked just as it
did before, but inside and for the sound it made, it was a
different guitar. For the better that is!!
Much, much better!!!
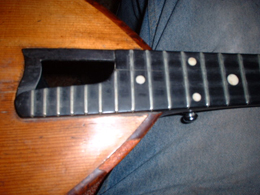 Before:
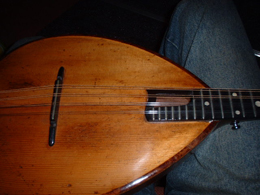
The front of the Mandola,
showing the unusual soundhole and a piece of Burl Walnut
veneer missing on the edge of the body.
The front of this Mandola had also collapsed inward around the bridge area (not shown in pic.)
 After:
If you look to the
bottom right, you can see the new piece of Walnut veneer,
pieced into the edging (it's not really a binding!).
It turned out really nicely, and may even last another 150 years. At least, I would like to think so
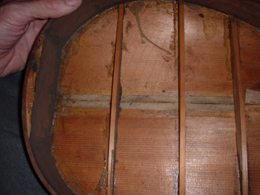
Using the original techniques, the hide glue joint on the back prised
apart quite easily. Now to see what was causing the trouble!
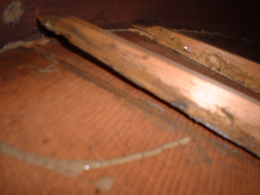
Well, there's no doubting what was wrong here! The old
hide glue had given up its hold. However, after 150 years
I don't think there's much cause for complaint.
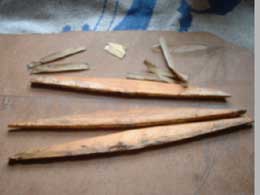
The old braces were removed and used as templates for the
new ones.
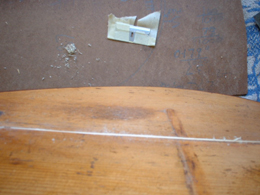
Before they can be fitted, there's a crack down the middle of the soundboard that needs sorting
with a spruce splice.
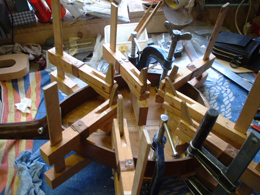
Here a clamp; there a clamp; everywhere a clamp !
In go the new braces and the shape gets put back in to the
top.
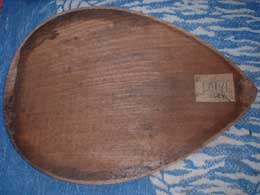
I am showing you the inside of the back, because of the unusual way it's been made. The
internal carving appears to have been done by drawing it over
a large circular saw !! This is apparent because you can see
the marks made by it inside the back (not easy in a pic this
size, but they are there!)
DANGEROUS !!!!!!!!!!!!!!
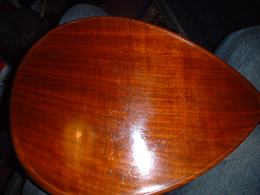
no attempt has been made to alter the original finish in any
way . In fact quite the opposite, with every possible care
taken to not damage the finish

If you look to the bottom right, you can see the new piece
of Walnut veneer, pieced into the edging (it's not really
a binding!)
It turned out really nicely, and may even last another 150 years !
At least, I would like to think so.
I have other examples ... but I always seem to be too busy to get the time to add them to this page ;-)